 how-to
How do you repair damaged canvas painting edges?
Last Updated: October 25, 2026
Quick Summary
To repair damaged canvas edges, first identify the damage type, frayed fibers, tears, dents, or pulled stretcher damage, then choose your repair method accordingly. For frayed edges, trim loose threads and seal with canvas-specific adhesive or gesso; for tears, apply patches from the back; for severe damage, consider restretching with edge reinforcement.
- Frayed edges and loose fibers can be fixed yourself by trimming threads and sealing with adhesive or gesso that dries in 24 hours.
- Tears and holes require patches cut at least 1 inch larger than the damage on all sides, applied from the back of the canvas.
- Use reversible, acrylic-based canvas adhesive for valuable paintings; avoid rubber cement and spray adhesive which fail quickly on canvas.
- Professional conservators should handle damage affecting more than 25% of the canvas edge, tears larger than 3 inches, or original artwork.
- Store canvases upright with stable humidity to prevent future edge damage from pressure and moisture fluctuations.
Table of Contents
- Assessing the damage to your canvas painting edges
- How to fix frayed canvas edges without removing the canvas
- Canvas repair materials you'll need
- How to patch a torn canvas from the back
- How to restretch a canvas painting with damaged edges
- Preventing repeat edge damage to your canvas
- When to take your canvas painting to a professional conservator
- Protect your original artwork with proper repair and care
- Frequently Asked Questions
Assessing the damage to your canvas painting edges
Damaged canvas edges are common: stretched paintings take a beating from moving, storage, humidity shifts, and handling, making it important to know how to repair damaged canvas edges. Not every damaged edge needs professional restoration, but misidentifying the damage type can make a repair worse.
Examine what happened: is the canvas frayed, torn, or dented? The damage type determines whether you can fix it yourself or need a conservator.
Identifying frayed edges and loose canvas fibers
Frayed edges happen when canvas fibers separate and loosen at the perimeter, leaving individual threads sticking out, often curled or bent.
Loose canvas fibers differ from a clean tear: the fibers are still connected to the main canvas, just no longer lying flat. This is one of the easier damage types to address yourself, especially if caught early.
Run your finger gently along the edge: rough or fuzzy fibers mean fraying, and separated individual threads mean loose fibers. Both signal that edge reinforcement or sealing is your next step.
Distinguishing tears, dents, and pulled stretcher damage
Tears are clean breaks in the fabric; a hole means canvas is missing entirely. Both require patching from the back.
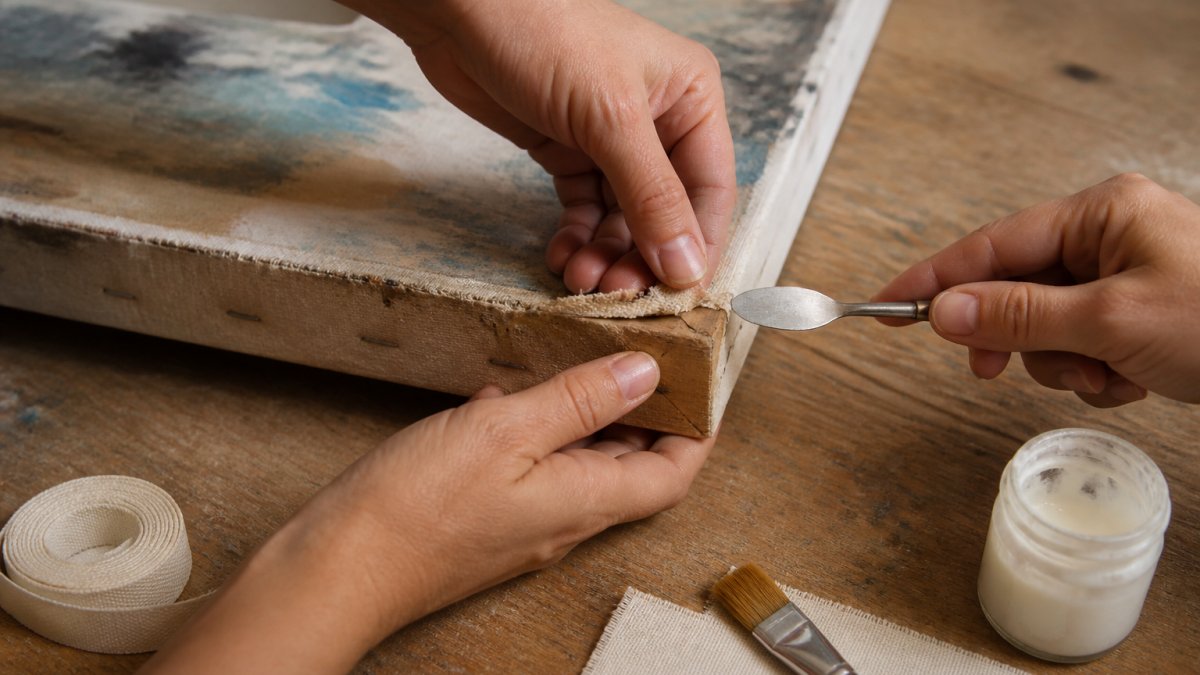
Pulled stretcher damage occurs when the canvas edge gets caught or tugged, pulling the fabric away from where it's stapled to the stretcher bars. You'll see a gap between canvas and frame, or wrinkling at the edge.
Each damage type needs a different approach: a tear needs a patch, a dent might need moisture and gentle pressure, and pulled stretcher damage might need reinforcement before restretching.
How to fix frayed canvas edges without removing the canvas
You can address frayed edges and loose fibers while the canvas stays on the stretcher, with no removal or conservator needed, just a few careful steps and basic materials.
Trimming loose threads and fibers safely
Start by gently trimming any loose threads clearly separated from the main canvas body. Small, sharp embroidery or craft scissors work best.
Hold the canvas edge steady, pull a loose thread slightly taut, and cut it close to where it meets the main canvas body.
For frayed areas rather than individual threads, trim only the most obviously separated fibers. Over-trimming can make the edge look worse and expose more fibers underneath.
After trimming, the edge should look cleaner but not perfect. That's normal; next, seal what remains.
Sealing frayed edges with adhesive or gesso
Once loose threads are trimmed, seal the edge to prevent further fraying. Two materials work well: adhesive designed for canvas repair or gesso.
Canvas-specific adhesive (often acrylic-based) is reversible, so a conservator can undo it later, which matters if the painting has value or sentimental importance.
Gesso is a primer-like coating that also seals edges.
Either option takes 24 hours to dry fully. Don't handle the edge during this time. Once dry, the fraying should stop.
Canvas repair materials you'll need
Before any repair beyond simple edge sealing, gather the right supplies. Wrong materials can damage the canvas further or create a repair that fails within months.
Choosing the right adhesive for your canvas
The adhesive you choose matters more than most people realize: the wrong one can yellow, become brittle, or fail to bond.
For valuable or original paintings, use a reversible adhesive specifically formulated for canvas repair.
For everyday paintings or prints, a quality craft adhesive works. Avoid rubber cement or spray adhesive, both fail quickly on canvas. Test any adhesive on a scrap of similar canvas first.
Budget for canvas-specific adhesive. It costs more than general-purpose glue but is the difference between a repair that lasts decades and one that fails in months.
Primers, gesso, and finish materials
Gesso seals edges and primes patches. Acrylic gesso dries quickly and is water-soluble, making cleanup easy; oil-based gesso is thicker, dries slower, and creates a more durable seal.
For most DIY repairs, acrylic gesso is sufficient: easier to work with and dries in 2-4 hours rather than days.
You'll also need fine-grit sandpaper (220-grit or higher) to smooth rough edges after gesso dries. A small brush for applying adhesive and gesso.
| Material | Purpose | Best For |
|---|---|---|
| Canvas adhesive | Bonding patches to canvas | Valuable paintings, reversible repairs |
| Acrylic gesso | Sealing edges and priming patches | Quick-drying, everyday repairs |
| Canvas patch fabric | Backing for tears and holes | Matching original canvas weight |
| Fine-grit sandpaper | Smoothing dried gesso and edges | Finishing repairs |
| Small brush | Applying adhesive and gesso | Precision work on edges |
How to patch a torn canvas from the back
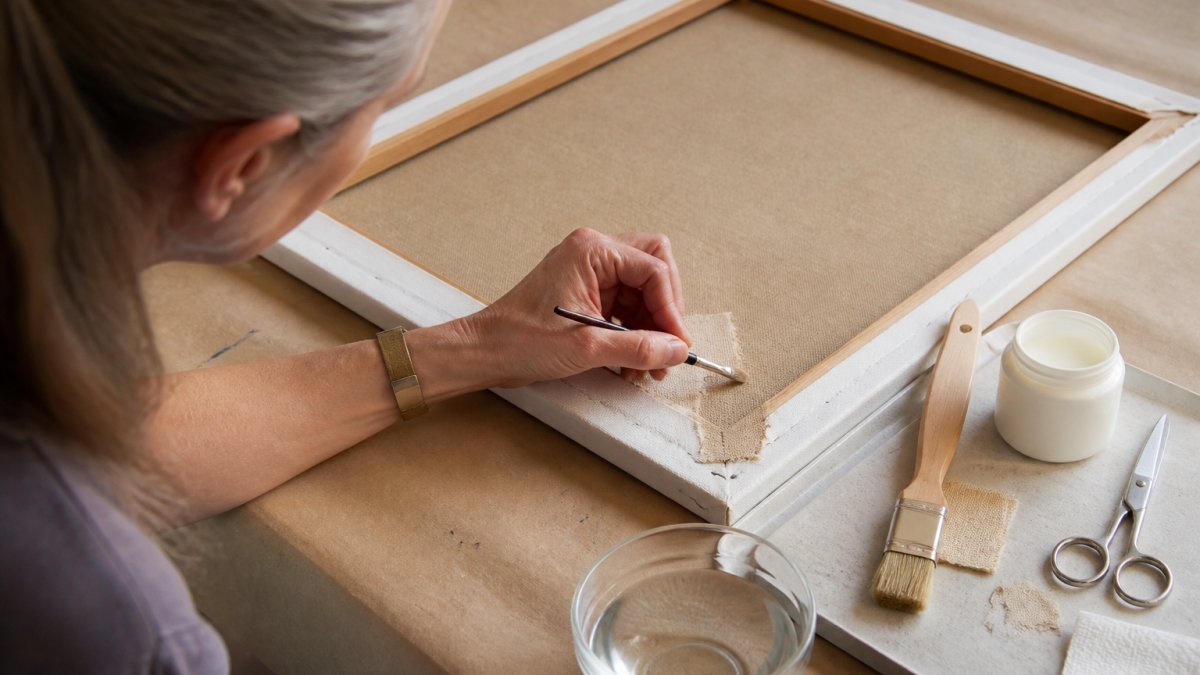
Tears and holes require patching from the back so the patch doesn't show on the front. This is where most DIY repairs go wrong: people patch from the front and end up with visible, clumsy fixes.
Preparing the damaged area and cutting your patch
First, examine the tear from the back. Identify the full extent of the damage. Small tears (under 2 inches) need patches slightly larger than the tear.
Cut your patch from canvas fabric that matches the original as closely as possible. Weight and weave matter.
Cut the patch at least 1 inch larger than the damaged area on all sides. Round the corners of the patch slightly rather than leaving sharp corners.
Prepare the damaged area by gently cleaning away any loose fibers or debris. Don't scrub, just remove what's obviously loose.
Feathering patch edges and applying adhesive
Before applying adhesive, dry-fit the patch.
Now apply adhesive to the back of the patch. Use a small brush and work adhesive into the edges and corners carefully.
Press the patch firmly against the back of the canvas. Hold it in place for 30-60 seconds.
Feathering the edges means gradually tapering the adhesive so the patch edge blends smoothly into the surrounding canvas rather than creating a hard line.
Let the patch dry for 24 hours before moving or handling the canvas. Once dry, check the repair from the front.
How to restretch a canvas painting with damaged edges
Some canvas edge damage requires restretching, removing the canvas from its stretcher bars and pulling it tight again. This is more involved than patching, but it's often necessary for severe damage.
When edge reinforcement is necessary before restretching
If you need to repair damaged canvas edges that are severely frayed, torn along the fold line where the canvas wraps around the stretcher, or if the tacking margins (the edges stapled to the stretcher) are damaged, reinforcement before restretching is critical.
Strip lining means gluing a strip of canvas fabric to the back edges of the painting before restretching. This reinforces weak areas and prevents the original canvas from tearing further when pulled tight.
If you're confident in your adhesive skills and the damage is limited to one or two edges, you can apply strip lining yourself. Cut strips of canvas 2-3 inches wide and long enough to cover the damaged edge plus 2 inches on either side. Apply adhesive to the back of the strip and press it firmly to the back edge of the painting.
For severe damage or valuable paintings, professional restretching is worth the investment. A conservator has the tools and experience to restretch without causing new damage.
Preventing repeat edge damage to your canvas
Once you've repaired your canvas edges, protect them from future damage. Most edge damage is preventable with simple care habits.
Store stretched canvases upright rather than stacked flat. Flat storage puts pressure on edges and corners. Upright storage distributes weight evenly.
Handle canvases by the stretcher bars, never by the canvas itself. Grabbing the canvas edge is the fastest way to damage it.
Humidity matters more than people realize. Rapid humidity swings cause canvas to expand and contract, stressing the edges.
Learn how to maintain canvas paintings after repair to protect your work. Proper framing and mounting also prevent future edge damage. Professional framing guidance and original fine art framing techniques both address how to protect canvas edges during the framing process.
When to take your canvas painting to a professional conservator
Some damage is beyond DIY repair. Know when to stop and call a professional.
If the painting is valuable, original, or has sentimental significance, professional conservation is the right choice.
Take your canvas to a professional if:
- The damage involves more than 25% of the canvas edge
- The tear or hole is larger than 3 inches
- The canvas is an original artwork or has monetary value
- The damage is along the fold line where the canvas wraps around the stretcher
- Previous repairs have failed or caused new damage
- You're unsure whether your repair attempt will hold
Professional conservators use reversible materials and techniques. They document their work so future conservators understand what was done.
The National Center for the Promotion of Cultural Properties documentation on canvas repair describes professional techniques including single-thread bonding and advanced reinforcement methods that preserve the painting's integrity and value.
Protect your original artwork with proper repair and care
Canvas edge damage doesn't have to mean the end of a painting you love. Most damage can be repaired with patience, the right materials, and honest assessment of what you can handle yourself. Whether you're maintaining a piece from our collection or protecting art you've acquired elsewhere, the principles are the same: assess carefully, choose reversible materials, and know when professional help matters. Start with the repair methods that match your damage type, take your time, and let each step dry fully before moving forward.
Frequently Asked Questions
Can you fix frayed or torn canvas edges without repainting the artwork?
Yes, many edge repairs preserve the original painted surface. For frayed edges, trim loose threads and seal with archival adhesive or gesso applied to the back. For small tears near the edge, patch from the back with canvas and adhesive. Larger damage or tears in painted areas may require touch-up, but the original artwork remains intact. Professional conservators use reversible materials to ensure repairs don't permanently alter valuable paintings.
What materials do you need to repair a torn canvas painting?
Essential canvas repair materials include archival adhesive (pH-neutral and reversible), gesso or primer, a small canvas patch, fine scissors or craft knife, sandpaper, and a brush. For frayed edges, you'll also need a misting bottle with water to help canvas fibers swell before trimming. Always use materials rated for art conservation to avoid damaging the painting over time.
How do you repair a canvas painting that has pulled away from the stretcher bars?
First, check if the canvas is simply loose by gently pushing on the edge. If it's pulled away due to humidity changes, you may restretch it by removing tacks or staples, pulling the canvas taut, and re-securing it. For damaged tacking margins or severe pulling, edge reinforcement with strip lining may be necessary before restretching. If the stretcher bars are warped or the damage is extensive, professional conservation treatment is recommended to avoid further damage.
When should a torn canvas painting be taken to a professional conservator?
Seek professional help if the painting is valuable, original, or historically significant; if damage extends into painted areas; if the tear is large or affects structural integrity; or if the canvas shows signs of mold, water damage, or severe deterioration. Conservators use specialized techniques and reversible materials to preserve original artwork. For emotionally significant pieces or family heirlooms, professional treatment ensures the painting is restored safely and maintains its integrity for future generations.