 blog
Best Lighting Solutions for Artist Studios
Last Updated: October 23, 2026
Quick Summary
The best lighting solutions for artist studios combine high-CRI LED panels at 5500 K daylight balance for ambient illumination with adjustable task lights positioned at 45-degree angles to eliminate shadows and glare. Target 500-1,000 lux at your work surface, ensure CRI of 95 or higher, and use dimmable, flicker-free fixtures to maintain accurate color perception across different viewing environments.
- North-facing windows provide ideal natural light at 5500 K, but artificial lighting is essential for consistent professional work, especially during evening hours or winter.
- High-CRI LEDs with 95+ rating and daylight-balanced temperature prevent color shifts between your studio and where finished artwork is displayed.
- Position ambient panels 3-4 feet overhead and task lights at 45-degree angles 2-3 feet from canvas to achieve even 500-1,000 lux without harsh shadows.
- LED fixtures consume minimal energy and last 25,000+ hours, costing only a few dollars monthly to operate versus halogen alternatives.
- Small studios need two ambient panels plus two task lamps for roughly $150-$700; medium studios require three panels and multiple task lights for $400-$900 total.
Table of Contents
- Why Artist Studio Lighting Matters for Your Work
- Natural Light and North-Facing Windows
- Understanding Color Temperature and CRI for Accurate Color Perception
- LED Lighting for Art Studio: Combining Efficiency with Performance
- Lighting Solutions for Art Studio with Limited Natural Light
- Brightness, Distribution, and Positioning for Shadow-Free Work
- Building Your Complete Studio Lighting Setup
- Frequently Asked Questions
Why Artist Studio Lighting Matters for Your Work
Proper lighting transforms how you see color, shadow, and detail in your artwork, which is why finding the best lighting solutions for artist studios is essential to your practice.
The stakes are real. Artists who invest in best lighting solutions for artist studios report seeing their color accuracy improve immediately. You catch mistakes you'd otherwise miss.
Proper lighting affects everything from how you perceive hues to how you position your canvas.
Natural Light and North-Facing Windows
Natural light remains the gold standard for color accuracy, but only if you have access to it.
The challenge: north light is limited in intensity and completely absent during evening hours.
If you do have a north-facing window, position your easel perpendicular to it so light falls evenly across your work surface without creating reflections on wet paint or gloss finishes.
Understanding Color Temperature and CRI for Accurate Color Perception
Two technical specs matter most: color temperature (measured in Kelvin, or K) and Color Rendering Index (CRI).
Color temperature describes whether light feels warm or cool. Daylight sits around 5500 K, neutral and balanced.
CRI measures how faithfully colors appear under that light compared to natural daylight.
The practical difference: under low-CRI light, a painting might look vibrant in your studio but appear dull or shift in tone when displayed elsewhere.
LED Lighting for Art Studio: Combining Efficiency with Performance
LED panels have become the standard for professional studios because they deliver high CRI, adjustable intensity, and minimal heat output, critical when you're working for hours in a small space.
Look for LED panels with these features:
- High CRI (95+) for accurate color rendering
- Daylight-balanced temperature (5500 K)
- Dimmable controls to adjust brightness without color shift
Panel lights work best for ambient lighting, they bathe your entire workspace in consistent, flicker-free light.
LED efficiency matters too. Unlike older fluorescent or halogen studio lights, LEDs consume a fraction of the energy and produce minimal heat.
Lighting Solutions for Art Studio with Limited Natural Light
Not every studio has a north-facing window or adequate daylight access.
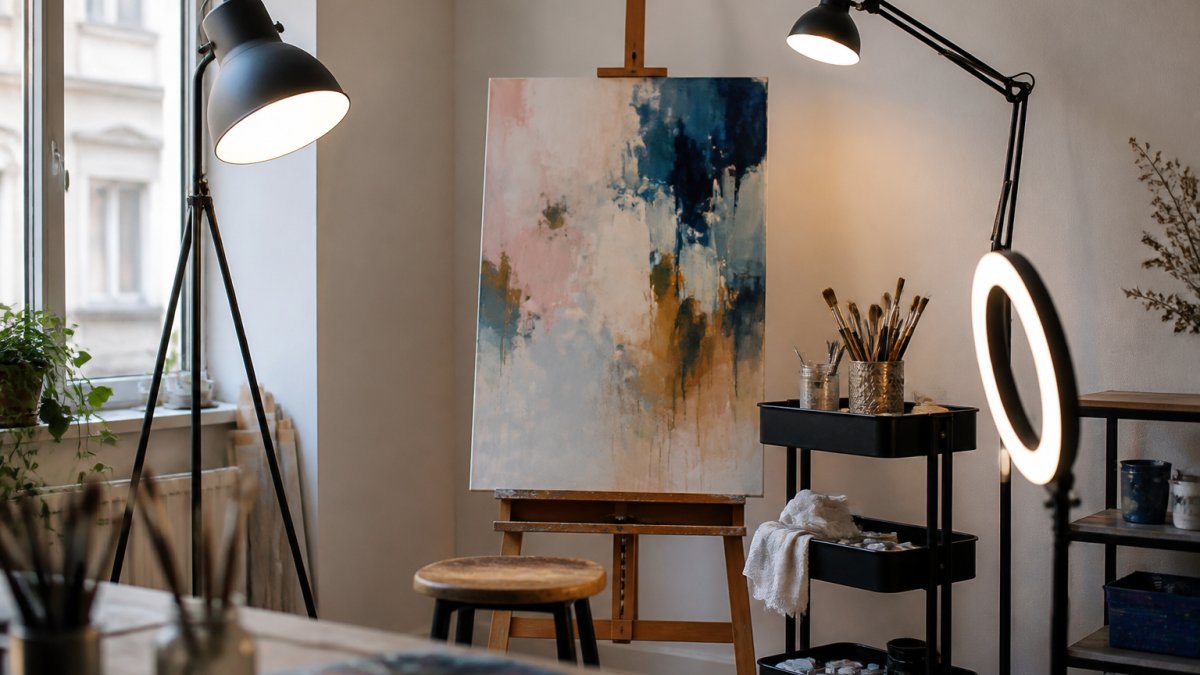
The solution is layered lighting: ambient panels overhead for general illumination, supplemented by adjustable spotlights positioned at 45-degree angles to your work surface.
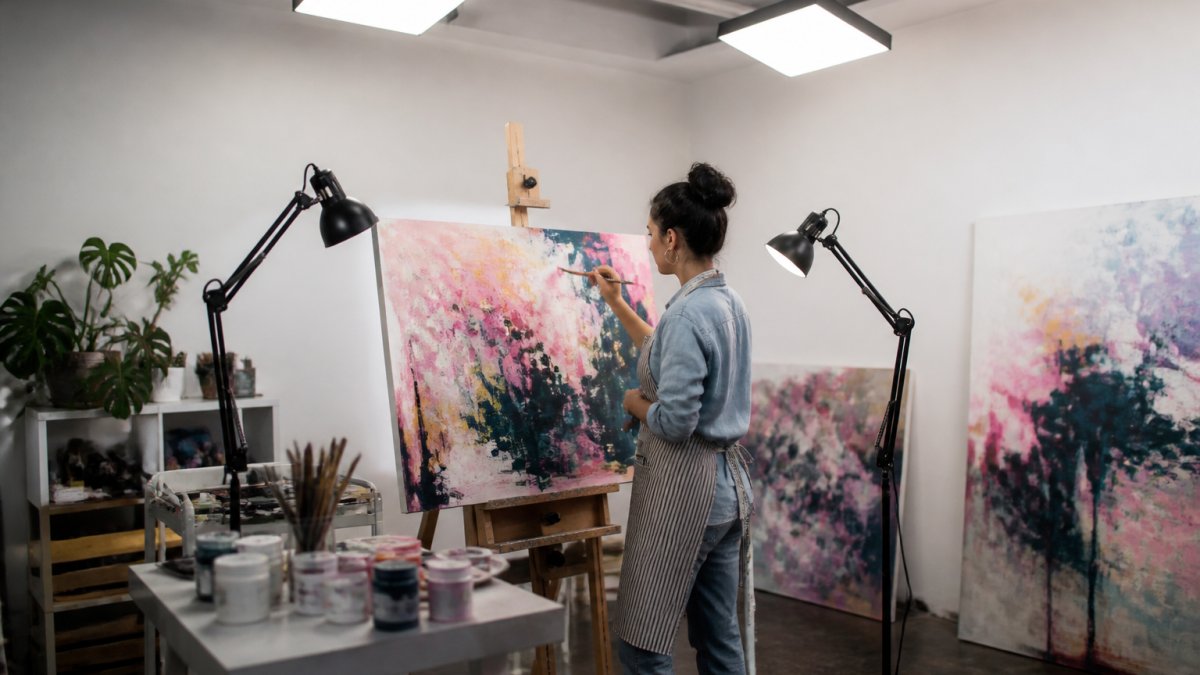
Position overhead LED panels at least 3-4 feet above your head to avoid casting shadows from your own body. Mount adjustable task lights on either side of your easel at roughly 45-degree angles, this is the sweet spot for eliminating reflections and shadows without creating uneven brightness.
Avoid pointing lights directly at your work surface from above or behind you. Direct overhead light causes glare on glossy or wet paint.
For studios with limited space, clip lamps and floor lamps offer flexibility.
Brightness, Distribution, and Positioning for Shadow-Free Work
The goal is even light distribution with no dark corners, harsh shadows, or bright spots that cause eye strain. Getting there requires translating general advice into measurable targets you can actually set up and verify.
Know your brightness units
Brightness is measured two ways: lumens (total light output from a fixture) and lux (light intensity at a specific surface). In American practice you'll also see foot-candles; 1 foot-candle equals about 10.76 lux, so 500 lux is roughly 46 foot-candles and 1,000 lux is roughly 93 foot-candles. For detailed artwork, target roughly 500-1,000 lux (about 46-93 foot-candles) at the work surface.
Convert fixture specs into surface brightness
A fixture's lumen rating doesn't tell you what reaches your canvas. As a working rule, illuminance falls off with the square of distance: doubling the distance from a point source cuts surface brightness to about one-quarter. A 2x2-foot LED panel rated around 2,000-3,000 lumens mounted 3-4 feet above the work surface typically lands in the 500-1,000 lux range when aimed squarely at the easel; the same panel pushed to 6-8 feet drops well below the target.
Use beam angle and distance together
Beam angle determines the pool of light a task fixture throws. A narrow 25-40 degree spot concentrates intensity for detail work but creates a hot center and falloff at the edges; a 60-90 degree flood spreads light evenly across a larger canvas. For an easel, a common pattern is a 36-60 degree beam at 2-3 feet, angled so the cone covers the canvas without spilling onto your face or the wall behind you.
Position for shadow and glare control
Mount ambient panels at least 3-4 feet above your head so your body doesn't cast a shadow onto the work. Place task lights on both sides of the easel at roughly 45-degree angles, 2-3 feet from the canvas, so the two cones overlap and cancel each other's shadows. Avoid direct overhead light on glossy or wet paint, and never light from behind you, which throws your shadow onto the canvas.
Verify the setup
- Shadow test: hold your hand over the canvas; a sharp, dark shadow means reposition or add a second source. Shadows should be soft and subtle.
- Glare test: look for reflections on wet paint or varnish; lower the angle or move lights further to the side.
- Evenness test: sweep a lux meter across the canvas; readings should stay within roughly 20-30% of each other corner to corner.
| Lighting Element | Purpose | Target Spec | Ideal Position |
|---|---|---|---|
| Ambient LED panels | Even overall illumination | 500-1,000 lux at surface; CRI 95+; 5500 K | 3-4 feet overhead, centered |
| Task spotlight (left) | Detail work, shadow reduction | 36-60 degree beam; dimmable | 45-degree angle, 2-3 feet from canvas |
| Task spotlight (right) | Detail work, shadow reduction | 36-60 degree beam; dimmable | 45-degree angle, 2-3 feet from canvas |
| Lux meter check | Verify evenness | Within 20-30% corner to corner | At canvas surface |
Building Your Complete Studio Lighting Setup
A complete setup combines ambient and task lighting, sized to your workspace and art practice. The sections below translate room size into specific fixture counts, specs, and realistic budget tiers so you can choose a solution rather than assemble one by trial and error.
Spec targets for every tier
Whatever your budget, hold these minimums: CRI 95+, 5500 K daylight balance, dimmable without color shift, and flicker-free drivers. Lower-CRI or non-dimmable fixtures will undercut the color accuracy the rest of this guide is built around.
Small studios (under 150 sq ft)
- Ambient: two 2x2-foot high-CRI LED panels, roughly 2,000-3,000 lumens each, mounted overhead.
- Task: two adjustable clip lamps or articulated floor lamps with 36-60 degree beams.
- Budget tier: roughly $150-$350 total for panels and task lamps at entry level; $350-$700 for panels with dimming and higher CRI.
Medium studios (150-300 sq ft)
- Ambient: three LED panels, or a mix of panels and a broad flood fixture.
- Task: upgrade to articulated arm lamps that hold position precisely; add a second pair if you maintain two work areas.
- Budget tier: roughly $400-$900 total, depending on panel CRI and dimming quality.
Large studios (300+ sq ft)
- Ambient: a grid of 4-6 LED panels sized to ceiling height; higher ceilings need more output or lower mounting to keep surface lux in range.
- Task: multiple task lights around the primary easel and any secondary work table.
- Budget tier: roughly $900-$2,000+ total, with cost driven mainly by panel count and dimming controls.
Budget tiers at a glance
| Tier | Ambient | Task | Typical Total |
|---|---|---|---|
| Low | 2 entry panels, CRI 90+ | 2 clip lamps | ~$150-$350 |
| Mid | 3 panels, CRI 95+, dimmable | 2-4 articulated arm lamps | ~$400-$900 |
| High | 4-6 panels, CRI 95+, flicker-free | Multiple precision task lights | ~$900-$2,000+ |
Operating cost and heat
LEDs consume a fraction of the energy of halogen or incandescent studio lights and produce minimal heat near artwork. A full LED studio setup running 8 hours daily typically costs only a few dollars a month in electricity at common residential rates, versus noticeably more for equivalent halogen output. LEDs also last 25,000+ hours, reducing replacement frequency and keeping color output stable over time.
Match the plan to your practice
- Easel painting: prioritize two 45-degree task lights plus even ambient panels.
- Drawing desk: a single articulated task lamp with a 36-60 degree beam and a dimmer is often enough.
- Photography or documentation area: add a pair of matched lights at equal distance and angle to control glare and mixed-light problems when capturing work.
All setups should include dimmers or adjustable intensity controls. Brightness needs vary by time of day, palette, and eye comfort, and adjustability extends fixture lifespan while preventing eye fatigue.
Professional lighting recommendations for color-critical work emphasize that consistent, adjustable, high-CRI lighting is essential for any artist who sells work or needs accurate color reproduction.
When you're ready to complete your studio setup, consider how your lighting environment complements your creative space. Best Art Supplies for Professional Artists work best when paired with proper illumination, your tools and your light work together to produce your best work. Similarly, many artists prioritize Sustainable Art Materials for Eco-Conscious Creators alongside energy-efficient LED lighting to align their entire practice with their values. Finally, once your lighting is optimized, Abstract Art Inspiration for Creative Workspaces: 7 Steps helps you design an environment where both technical precision and creative flow thrive.
Frequently Asked Questions
What color temperature is best for an artist studio?
Daylight-balanced lighting at 5500K (Kelvin) is ideal for most artist studio work because it matches natural daylight and allows you to see colors as they truly are. This neutral temperature prevents warm or cool color casts that distort your perception. If you work primarily on digital pieces or photography, 5500K ensures your screen work translates accurately to print. Lower temperatures (3000K-4000K) create warm, yellowish light that can skew color judgment, while higher temperatures above 6500K feel too blue and clinical.
How do I reduce glare and shadows when lighting my artist studio?
Position lights at a 45-degree angle to your work surface, this angle minimizes direct glare on the canvas while preventing harsh shadows. Use diffusers or frosted bulbs to soften the light source. Avoid placing a single overhead light directly above your easel; instead, use layered lighting with ambient panels for overall illumination and adjustable spotlights for task areas. Light-colored or white walls reflect light evenly and reduce dark spots. If you see a shadow falling across your work, move the light source farther away or adjust its angle slightly.
Are LED lights good for painting and drawing?
Yes, high-CRI LED lighting is excellent for artist studio work. LEDs produce consistent, flicker-free light without the heat buildup of older bulbs, allowing you to work longer without eye strain or overheating your studio. Look for LEDs with a CRI (Color Rendering Index) of 90 or higher, this measures how accurately colors appear under that light. Daylight-balanced LEDs (5500K) combined with adjustable intensity let you match your lighting to the time of day and your specific project needs. They also use significantly less energy than fluorescent or incandescent alternatives.
How many lumens do I need for an art studio?
Most artist studios need 500-1000 lumens per square meter for detailed color work. A typical 10-by-12-foot studio (about 11 square meters) benefits from 5,500-11,000 total lumens distributed across ambient and task lighting. However, the quality of light matters as much as quantity, even 1000 lumens of high-CRI, evenly distributed light beats 2000 lumens of poor-quality, shadowy light. Adjust brightness based on your medium: digital work and color-matching may need more intensity than sketching or conceptual work. Test your setup by painting a sample and comparing it under different lighting conditions.