 how-to
DIY Gallery Wall Layouts for Small Spaces
Table of Contents
- Plan Your Gallery Wall Layout Ideas Before Hanging
- Gallery Wall Templates That Fit Compact Walls
- Gallery Wall Spacing: Getting the Distance Right
- Gallery Wall Frame Size Guide for Tight Spaces
- Create a Floor Mockup Before You Hang
- Renter-Friendly Hanging Methods for Small Walls
- Hanging Your Gallery Wall Step by Step
- Frequently Asked Questions
Last Updated: October 14, 2026
Plan Your Gallery Wall Layout Ideas Before Hanging
Creating a gallery wall in a small space requires careful planning, and diy gallery wall layouts for small spaces benefit most from visualization before you pick up a hammer. The key is visualizing your design on paper first, not on your wall. This approach saves time, reduces mistakes, and helps you see exactly how your artwork will look together.
Start by understanding your wall's actual dimensions. Measure the height and width in inches. Note any obstacles like windows, doors, outlets, or light switches. These details matter more in tight spaces where every inch counts.
Measure your wall and sketch the space
Grab a tape measure and a piece of paper. Write down your wall's exact measurements. Include the location of any architectural features that will affect your layout.
Next, create a simple sketch of your wall on paper. Draw it to scale if possible, but even a rough outline works. Mark where light switches, outlets, or windows sit. This sketch becomes your planning tool.
Consider the wall's height and how your eye naturally moves across it. In small spaces, the center of your gallery wall should align roughly with eye level, which sits around 57 inches from the floor. This height works for most viewers standing in your room.
Choose your arrangement style
Different arrangement styles create different visual impacts in small spaces. Your choice depends on the mood you want and how much wall space you have available.
Symmetrical arrangements create calm, balanced spaces. They work well above couches or beds. Pieces mirror each other on both sides of a center point. This style feels organized and intentional.
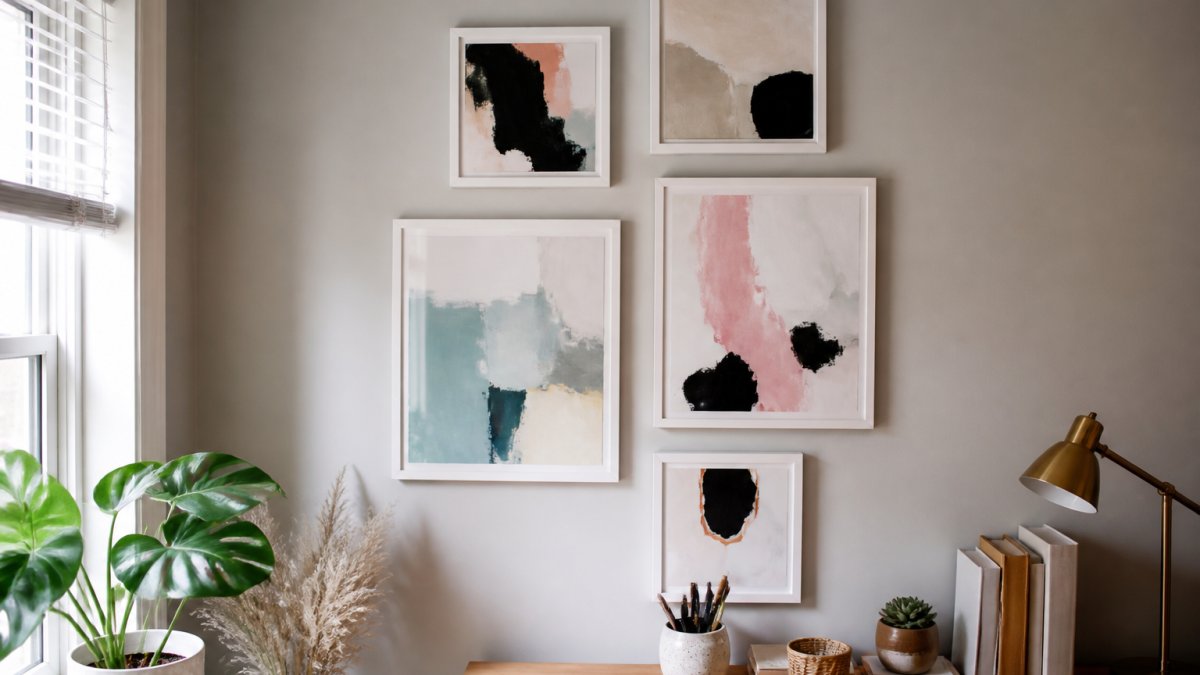
Salon-style layouts pack more artwork into less space. Pieces vary in size and frame style. They create an eclectic, collected-over-time feeling.
Vertical stacks work for narrow walls. Frame sizes can stay consistent or vary. This arrangement draws the eye up and down, making the wall feel taller.
Choose your style based on your room's personality and the space you're working with. Small spaces benefit from styles that feel intentional rather than random.
Gallery Wall Templates That Fit Compact Walls
Ready-made templates take the guesswork out of diy gallery wall layouts for small spaces, offering proven arrangements designed specifically for compact walls. These proven arrangements work specifically for small wall spaces. Each template balances visual interest with smart use of limited space.
Vertical stack template for narrow walls
A vertical stack works perfectly when your wall is taller than it is wide. This template arranges frames in a single column or two narrow columns.
How it works:
- Choose 4-6 frames for a single-column stack
- Keep frames the same width but vary heights
- Space them evenly (we'll cover exact spacing next)
- Center the stack on your wall
This template creates strong vertical lines that make small rooms feel taller. It works above a console table, a desk, or beside a doorway. The narrow footprint means it fits almost anywhere.
Symmetrical grid for balanced small spaces
A grid template uses frames of the same size arranged in neat rows. This creates visual calm and works in spaces where you want order and balance.
Basic grid options:
- 2x2 grid (4 frames total)
- 3x2 grid (6 frames)
- 2x3 grid (6 frames, taller than wide)
Grids work best when your wall is roughly square or slightly rectangular. Each frame takes the same space, making planning simple. The symmetry feels intentional and modern.
Salon-style arrangement for maximum impact
Salon-style layouts pack more frames into less space. Pieces vary wildly in size and frame style. This template creates visual richness without overwhelming small walls.
How to build a salon arrangement:
- Start with one large focal piece in the center
- Add medium-sized pieces around it
- Fill gaps with smaller frames and artwork
- Let pieces overlap slightly in your mockup (but not on your wall)
- Mix frame colors and styles for eclectic appeal
Salon-style works best when you have diverse artwork to display. Small spaces benefit because the varied sizes and styles create visual interest that compensates for limited wall area.
Gallery Wall Spacing: Getting the Distance Right
Spacing between frames makes or breaks a gallery wall. Too much space wastes precious wall area. Too little feels cramped. The right spacing creates visual harmony in tight rooms.
Standard spacing between frames
Most designers recommend 2-3 inches between frames as a standard. This distance feels natural to the eye and creates a cohesive gallery feel.
In small spaces, you might tighten spacing to 1.5-2 inches. This keeps your gallery wall compact while maintaining visual breathing room. Frames still feel grouped together rather than scattered.
Measure spacing from frame edge to frame edge, not from center to center. Use a ruler or measuring tape to mark these distances during your floor mockup. Consistency matters more than perfection.
Adjusting spacing for small walls
Small walls call for intentional spacing choices. Too much space between frames makes a small gallery feel sparse. Too little makes it feel chaotic.
Consider your wall's total square footage. For walls under 40 square feet, use 1.5-2 inch spacing. For walls 40-60 square feet, standard 2-3 inch spacing works well. Above 60 square feet, you can push to 3-4 inches.
The spacing also depends on your arrangement style. Symmetrical grids look best with consistent, generous spacing. Salon arrangements can handle tighter, more varied spacing. Vertical stacks need enough space to feel like separate pieces, not one tall artwork.
Gallery Wall Frame Size Guide for Tight Spaces
Frame size dramatically affects how your gallery wall feels in a small space. The right proportions make small walls look intentional. Wrong proportions overwhelm the space.
Proportion rules for small walls
The largest frame should not exceed one-third of your wall's width. If your wall is 36 inches wide, your largest frame should be around 12 inches wide.
Keep frame heights proportional too. In small spaces, vary heights by no more than 8-10 inches between your largest and smallest frames. Too much variation creates visual chaos.
For symmetrical arrangements, choose frames that are close in size. A 2x2 grid works best when all four frames are the same size or very similar. For salon-style layouts, size variation is your friend. Mix 5x7, 8x10, 11x14, and 16x20 frames together.
Mixing frame sizes without overwhelming the space
Small spaces can handle mixed frame sizes if you follow a few rules. Create a visual hierarchy with one focal piece larger than the rest. Make that piece your anchor, then build around it.
Use the "rule of three": choose three dominant frame sizes and repeat them throughout your arrangement. This creates rhythm without monotony. For example, use three 8x10 frames, three 11x14 frames, and three 5x7 frames.
Space larger frames farther apart. Smaller frames can cluster closer together. This balance prevents large frames from dominating and small frames from getting lost.
Consider frame depth too. Thin frames (under 1 inch) feel lighter and less bulky in small spaces. Thicker frames (2+ inches) add visual weight. Mix frame styles to create interest while maintaining cohesion.
Create a Floor Mockup Before You Hang
A floor mockup is your dress rehearsal for your gallery wall. You arrange everything on the floor first, photograph it, and live with that image for a few days.

How to make your mockup:
Cut paper or cardboard to match your frame sizes. Label each piece with the artwork it will hold. Arrange everything on the floor in the exact layout you plan for your wall.
Live with that photo for 2-3 days. Look at it on your phone. Show it to family members. Your eye will catch issues you missed initially.
Adjust your mockup as needed. Move pieces around. Try different spacing. Once you're satisfied, measure the distance from your mockup's edges to create a template for your wall.
Renter-Friendly Hanging Methods for Small Walls
Renters face unique challenges when creating gallery walls. You need methods that won't damage walls or cost your security deposit. Fortunately, modern alternatives work as well as traditional nails.
Damage-free hanging options:
Command strips and adhesive hooks hold lightweight frames securely. They remove cleanly without leaving marks. Choose strips rated for your frame's weight.
Magnetic strips work on metal walls or over metal studs (if you can locate them). They're reusable and completely removable.
Velcro strips offer another option for very lightweight frames. Art prints and small canvases work well with velcro. Heavier pieces need stronger solutions.
For temporary arrangements, lean frames against the wall instead of hanging them. A narrow shelf or ledge creates a gallery wall effect without any wall damage.
Hanging Your Gallery Wall Step by Step
Once your mockup is approved, it's time to hang. This process takes patience and precision, especially in small spaces where mistakes are visible.
Mark your starting point and work outward
Choose your focal piece first. This is usually your largest frame or the piece with the most visual impact. Mark its position on the wall with a light pencil line.
Measure from the wall's center point to your focal piece's center. Transfer this measurement to your wall. Mark the exact center of where your focal piece will hang.
Work outward from this anchor piece. Hang pieces adjacent to it next. Then move to the next layer. This method prevents cascading mistakes where one wrong placement throws off everything else.
Use the right tools and hardware
A level is essential, even for experienced hangers. Small spaces amplify mistakes, so every frame must be truly level.
Use a stud finder to locate wall studs if you're hanging heavy pieces. Studs provide the strongest anchor points. In small spaces, you might not have the luxury of choosing placement based on studs, but knowing where they are helps.
Picture hanging hooks come in different weights. Match your hardware to your frame's weight. A 5x7 frame needs different hardware than an 11x14. Check frame weight before purchasing hooks.
A tape measure and pencil are your best friends. Measure twice, mark once. Small errors compound quickly.
Common mistakes to avoid
Don't hang everything at once. Hang your focal piece first, step back, and check it. Then add surrounding pieces one or two at a time.
Avoid spacing inconsistency. Measure spacing between frames carefully. Use spacers or painter's tape to mark exact distances. Inconsistent spacing makes even a good layout feel off.
Don't ignore the wall's architecture. Windows, doors, and outlets are permanent features. Work with them, not against them. A gallery wall that respects these features looks intentional rather than forced.
Don't hang frames too high or too low. Eye level sits around 57 inches from the floor for standing viewers. Center your gallery wall around this height.
Creating a gallery wall in a small space challenges you to think strategically about every element.
Frequently Asked Questions
How do I plan a gallery wall layout for a small space?
Start by measuring your wall and sketching the dimensions on paper. Decide whether you want a symmetrical grid, vertical stack, or salon-style arrangement. Use a floor mockup with paper cutouts to test your layout before hanging anything. This prevents mistakes and helps you visualize how the gallery wall will look with your specific artwork and frame sizes.
What spacing should I use between frames in a gallery wall?
Standard spacing between frames is 2 to 3 inches for a cohesive look. In small spaces, you can reduce this to 1.5 to 2 inches to make better use of limited wall space without making the gallery feel cramped. Consistent spacing creates visual balance and makes your arrangement feel intentional rather than random.
Can a gallery wall make a small room look bigger?
Yes, when done correctly. A vertical gallery wall draws the eye upward and creates the illusion of height, making ceilings feel taller. Using a mix of frame sizes and leaving negative space around your arrangement prevents the wall from feeling heavy. Avoid filling every inch of wall space; strategic white space is key to making small rooms feel open.
What frame sizes work best for small wall gallery layouts?
Mix smaller frames (5x7 and 8x10 inches) with one or two medium frames (11x14 inches) as focal points. Avoid oversized frames that dominate a small wall. The largest frame should take up no more than one-third of your total gallery wall space. This proportion rule ensures visual balance and prevents any single piece from overwhelming the compact layout.