 listicle
Creative Ways to Wrap Handmade Art Gifts: Protect and Impress
Last Updated: November 2, 2026
Quick Summary
The best way to wrap handmade art gifts is to protect the surface first, then add decoration. Place acid-free glassine or tissue over the artwork, add kraft paper or fabric on top, and tie with twine rather than taping the art itself. Protect canvas and frame corners before wrapping.
- Wrap the face of the piece in acid-free glassine or archival tissue before the outer paper.
- Protect canvas and frame corners with foam corner protectors or folded cardboard.
- Use low-tack painter's tape on paper, never on the artwork or canvas edge.
- Cut outer paper about 3 to 4 inches larger than the piece on all sides.
- Tie twine in both directions so the wrap closes without tape on the art.
Table of Contents
- Why Wrapping Handmade Art Gifts Takes More Planning
- Eco-Friendly Materials for Wrapping Art: Kraft Paper, Muslin, and Textile Remnants
- How to Wrap a Gift in a Creative Way Without Damaging the Art
- Gift Wrapping Ideas Without Box: Fabric, Furoshiki, and Flat Packages
- Gift Wrapping Ideas With Box: Protective Layers for Framed and Canvas Pieces
- Embellishments and Personalized Gift Tags: Twine, Dried Botanicals, and Hand Stamps
- Creative Ways to Wrap Handmade Art Gifts for Christmas and Last-Minute Gifting
- Frequently Asked Questions
Why Wrapping Handmade Art Gifts Takes More Planning
Wrapping handmade art gifts takes more planning than wrapping a standard present, because the wrap has to look thoughtful and protect a piece with fragile edges, a wet-looking finish or a frame that can crack. Many customers choose a painting for the right reasons, then wrap it in whatever paper is nearby and hope for the best.
Start with the piece itself. Check whether the artwork is unframed on canvas, framed under glass, or on paper behind a mat. Each format needs a different kind of protection. Canvas corners can dent, glass can break under pressure, and paper can crease or pick up moisture in a damp space.
Plan the wrap before you cut anything. Measure the piece, add enough paper to fold the edges under, and choose materials that match the recipient's home and the protection the piece needs. A quick plan avoids the common mistake of wrapping too tightly and pressing paint into the paper.
Eco-Friendly Materials for Wrapping Art: Kraft Paper, Muslin, and Textile Remnants
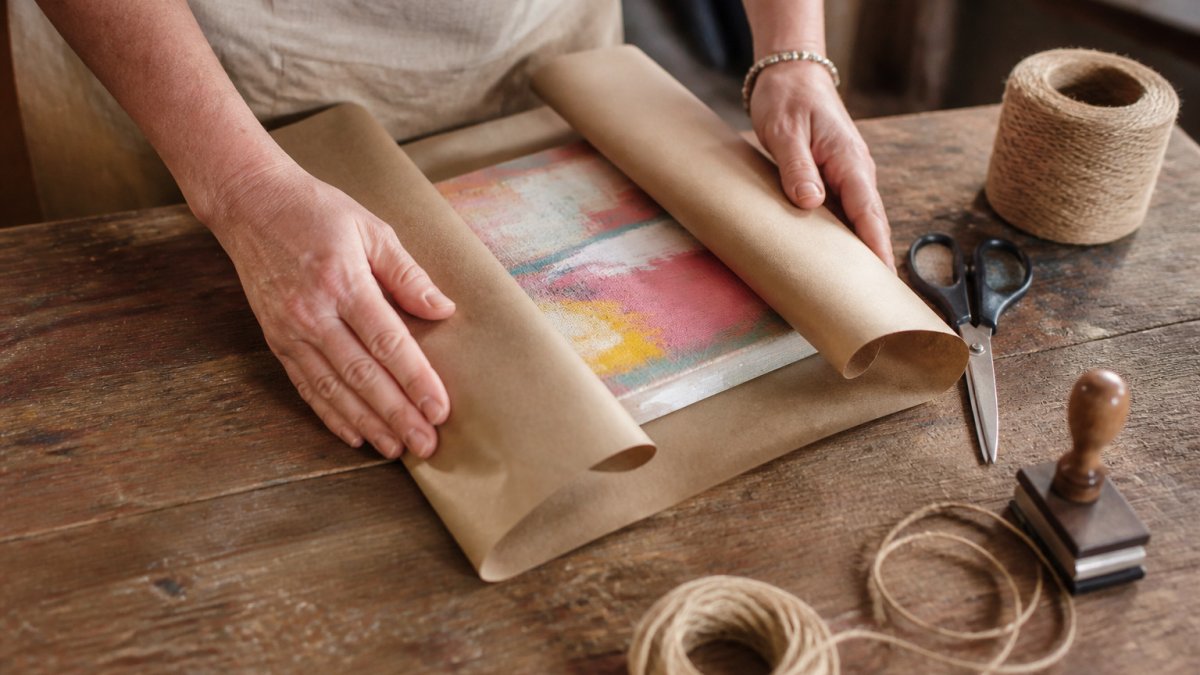
Many people now look for sustainable options, and several materials work well for art. Brown kraft paper is the most common choice. It is sturdy, widely recycled, and takes stamps, paint and marker well. Kraft paper rolls come in several widths, and a single roll goes a long way when you wrap several gifts.
Muslin and cotton textile remnants offer another route. They are reusable, soft against painted surfaces, and suit a minimalist look. Old fabric scraps from a sewing box work just as well. Cut the fabric larger than the piece, fold it like a flat package, and secure it with natural twine.
The eco-friendly choice does not always cost less up front. Fabric wraps can cost more than paper, but the recipient can reuse them. Weigh the initial price against how many times the material will be used.
How to Wrap a Gift in a Creative Way Without Damaging the Art
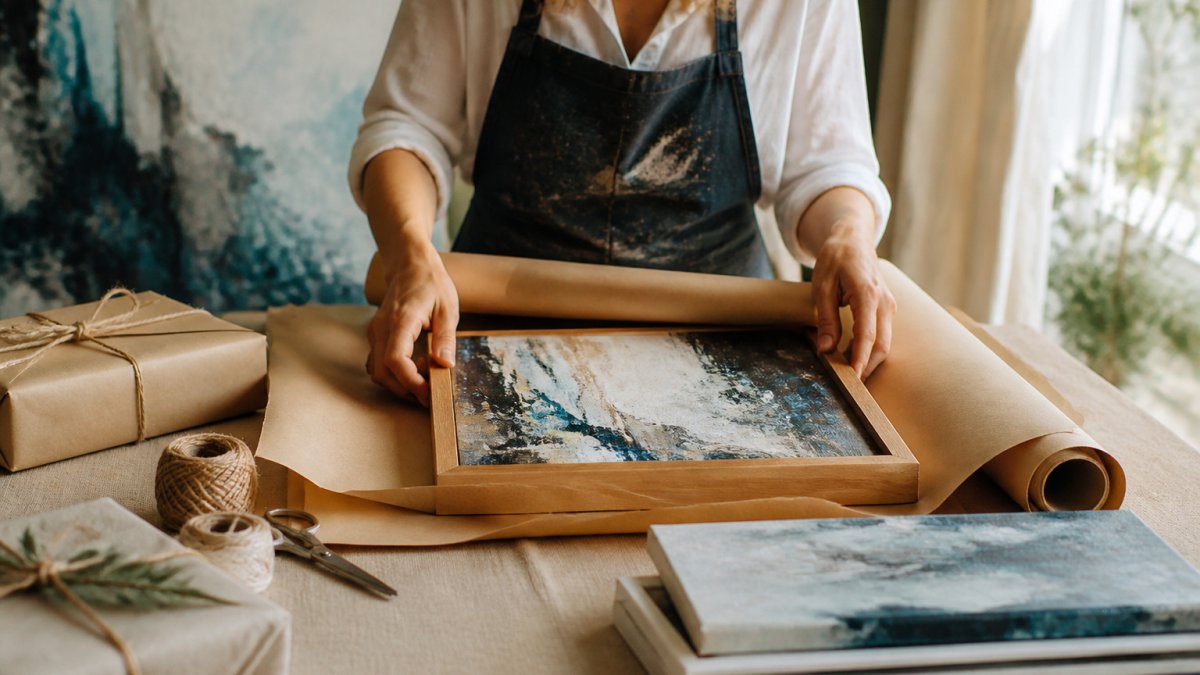
Protecting the artwork matters more than the decoration. Wrap the piece in a clean, acid-free layer such as glassine or tissue so the surface does not rub against the outer paper, then add the decorative layer on top.
Follow these steps for a secure, attractive wrap:
- Place the artwork face down on a clean, flat surface.
- Lay a protective layer of tissue or glassine over the front.
- Cut your kraft paper or fabric about 3 to 4 inches larger than the piece on all sides.
- Fold the paper over the back, then tape only the edges, never the painted surface.
- Tie twine around the package in both directions, keeping it snug but not tight enough to bend the frame.
A common mistake is using adhesive tape directly on the artwork or on a canvas edge. Use low-tack painter's tape on the paper, or tie the wrap closed. This keeps the piece clean and makes it easy for the recipient to unwrap.
Gift Wrapping Ideas Without Box: Fabric, Furoshiki, and Flat Packages
Not every handmade art gift needs a box. Flat or lightly framed pieces often look better in a simple, open wrap that shows some of the artwork. Fabric furoshiki wraps are a strong option here. They are a traditional Japanese method of wrapping with cloth, and they can be folded to fit a flat piece without adding bulk.
To wrap a flat piece in fabric, lay the cloth diagonally, place the artwork in the center, fold the corners over, and tie two opposing knots at the top. The result looks deliberate and keeps the piece protected from dust and light scuffs.
Cellophane bags offer a clear alternative. They let the art show through while protecting it from moisture. Heat-seal or tie the top closed, then add a tag or sprig of dried botanical for a finished look.
Gift Wrapping Ideas With Box: Protective Layers for Framed and Canvas Pieces
Framed and canvas pieces need more structure than paper alone can give. Glass can crack under a stacked box, canvas corners can crush, and a stretched canvas can dimple under pressure on its face.
Choose a corrugated box roughly 2 inches larger than the piece on every side so padding has somewhere to go. Before wrapping, see how the artwork is framed in the first place so the protective layers fit the frame correctly. A single-wall box is fine for hand delivery; use double-wall for anything shipped.
Build the protection in layers, from the artwork outward:
- Surface layer. Wrap the face of the piece in acid-free glassine or archival tissue. Do not use newsprint or printed tissue directly against the art; the ink can offset over time.
- Corner and edge layer. Slide foam corner protectors or folded cardboard triangles onto each corner of a canvas or frame. This is the single highest-value step for canvas, because corner dents are the most common transit damage and the hardest to reverse.
- Glass layer. For framed glass, run a strip of low-tack painter's tape in an X across the glass. If the glass does break, the tape holds the shards in place instead of letting them rake across the artwork. Do not use duct tape or packing tape on glass; the adhesive can leave residue on the frame.
- Cushion layer. Line the bottom of the box with a thin layer of cotton batting, bubble wrap or crumpled acid-free paper. Place the wrapped piece in the center, then fill the sides and top so the piece cannot shift when the box is tilted. The test: close the box and shake it gently. If you hear movement, add more cushion.
- Closure. Seal the box with packing tape along the center seam and both end seams. For shipped gifts, add a strip of tape around the perimeter where the lid meets the base.
Watch out: bubble wrap placed directly against an oil painting or a varnished surface can leave a pattern in the finish if the package sits in a warm truck. Keep bubble wrap on the outside of the glassine layer, never touching the art.
For shipping, the box is only half the job. The outer wrap has to be mailable. Wrap the sealed box in kraft paper, fold the ends flat, and tape every seam, a loose paper wrap can snag and tear in transit.
Archival glassine and foam corner protectors add a small cost per gift, which is modest compared with replacing a damaged original. Buy glassine in a roll or pack of sheets and cut to size; corner protectors come in multi-packs and store flat.
Make the unboxing part of the gift. A piece that arrives in a clean, well-padded box with the art facing up reads as cared for. Include a small card naming the materials and any care instructions, keep out of direct sun, dust with a dry cloth, so the recipient can keep the piece in good condition.
The steps for protecting framed and canvas pieces in a box come down to five layers, each with a specific job.
| Layer | What to use | Why it matters |
|---|---|---|
| Surface | Acid-free glassine or archival tissue | Keeps the face of the art from rubbing or offsetting ink |
| Corners and edges | Foam corner protectors or folded cardboard | Prevents corner dents, the most common transit damage |
| Glass | Low-tack painter's tape in an X | Holds shards in place if the glass breaks |
| Cushion | Cotton batting, bubble wrap or acid-free paper | Stops the piece from shifting inside the box |
| Closure | Packing tape on center and end seams | Keeps the box sealed during shipping |
Embellishments and Personalized Gift Tags: Twine, Dried Botanicals, and Hand Stamps
Small details make a handmade gift feel finished, but embellishments also have to survive the trip. A dried flower that crushes in a mailer or a tag that smears in the rain undoes the care that went into the wrap.
Twine and cord. Natural jute or cotton twine adds texture and costs very little; a single spool covers dozens of packages. Tie it in both directions so the wrap stays closed without tape on the art.
Dried botanicals. A sprig of dried lavender, eucalyptus or rosemary adds color and scent without weight. Tuck the stem under the twine cross so it is held flat rather than sticking out where it can snap.
Hand stamps. A custom rubber stamp with a name, motif or signature mark repeats across several gifts for a consistent look. Use solvent-based ink rather than water-based if the package may get damp; water-based ink can run.
Personalized tags. Tags are the cheapest way to make a gift feel individual. Cut tags from kraft paper scraps, cardstock or the back of an old greeting card. Write the recipient's name and a short line by hand with a fine-tip permanent marker, or stamp it.
Cost and sourcing. A basic embellishment kit, twine, a stamp, an ink pad, a hole punch and a stack of kraft tags, can be reused across many gifts and seasons.
Watch out: metal charms, bells or heavy beads tied to a mailed package can tear the paper or trigger a non-machinable surcharge at the post office. Keep mailed embellishments flat and light, and save the dimensional touches for hand-delivered gifts.
Attach the tag and any botanical after the twine is tied, not before. Tying twine over a tag can crease it, and a botanical trapped under a tight knot loses its shape.
Creative Ways to Wrap Handmade Art Gifts for Christmas and Last-Minute Gifting
Holiday gifting often arrives with a tight schedule, so simple methods help. A kraft paper wrap with a stamped pattern, twine and a dried botanical can be finished in under 15 minutes.
For last-minute gifts, keep a small kit ready: a roll of kraft paper, a spool of twine, a few tags, glassine sheets and a stamp. It covers most art gifts and removes the need to shop at the last minute.
If the timeline is too short to wrap an existing piece, consider contacting Susan Fielder Art directly about available options and current availability.
Frequently Asked Questions
What are some creative ways to make handmade gift wrapping?
Start with a neutral base such as brown kraft paper, muslin or washed fabric remnants, then add personal marks. Hand stamps, paint splatters, or simple line drawings with a marker make plain paper look custom. Finish with natural accents like twine, dried lavender or eucalyptus, or a tag written by hand. These approaches cost little, reuse materials you may already own, and suit abstract and framed art alike.
How can you wrap an art gift without a box?
Wrap the piece in a clean layer of acid-free tissue or glassine first so the surface stays protected. Cover it with a sheet of kraft paper or a fabric wrap, folding the corners neatly and securing them with washi tape, which leaves no residue. For a no-box option, a furoshiki-style fabric square tied with cotton twine adds a reusable, zero-waste finish. Add a sturdy cardboard backing on canvases so the wrap does not press into the paint.
How do you protect artwork while wrapping it?
Keep the painted surface from touching any wrapping material by using a protective sleeve, glassine or acid-free tissue. Avoid tape directly on the artwork and never use glue. Place corner protectors on framed pieces and add cardboard on both faces for canvases and panels. Wrap in a single smooth layer, then add an outer layer for dust and moisture resistance. Cellophane bags work well for showing off the piece while keeping it clean.
What materials can you use for handmade gift wrapping?
Brown kraft paper is inexpensive, durable and takes paint and stamps well. Muslin, cotton scraps and furoshiki-style fabric are reusable and sustainable choices. Dried botanicals, cotton twine and satin ribbon add texture to the finish. Clear cellophane bags protect delicate pieces. Choose materials that are acid-free and nonabrasive when the gift is artwork, so the piece stays in good condition after it is unwrapped.