 how-to
How to Display Abstract Canvas Art in Awkward Spaces
Table of Contents
- Measure First: Sizing Abstract Canvas Art for Difficult Walls
- Abstract Paintings for Living Room Decor: Placement Strategies That Work
- How to Hang Art on Slanted Walls and Other Non-Standard Surfaces
- Gallery Wall Layout Ideas for Small Spaces and Irregular Walls
- Creative Alternatives: Floating Shelves, Leaning, and Propping
- Using Interactive Visual Planning Tools Before You Commit
- Frequently Asked Questions
Last Updated: September 17, 2026
Measure First: Sizing Abstract Canvas Art for Difficult Walls
According to Rossetti Art's 2026 sizing guidelines, a piece of abstract art should span about two-thirds the width of the furniture below it. That single rule solves most awkward-wall problems before you ever pick up a drill. This guide from Susan Fielder Art walks through how to display abstract canvas art in awkward spaces, from slanted walls to narrow strips between windows.
The Two-Thirds Rule for Visual Anchoring
Visual anchoring means matching your canvas width to the furniture beneath it. A sofa that is 84 inches wide calls for art roughly 56 inches across. Go wider and the piece crowds the room. Go narrower and it floats, disconnected from everything around it.
Calculating Negative Space on Narrow or Broken Walls
Negative space is the empty wall left around your canvas. Designers recommend at least 6 to 8 inches of clearance on each side of a large abstract piece, per Rossetti Art. On a narrow wall, that math often means choosing a slender horizontal canvas instead of a square one.
Measure these before you buy:
- Total wall width, corner to corner
- Width of the furniture below
- Distance to the nearest window, door, or molding
- Outlet and switch locations
Abstract Paintings for Living Room Decor: Placement Strategies That Work
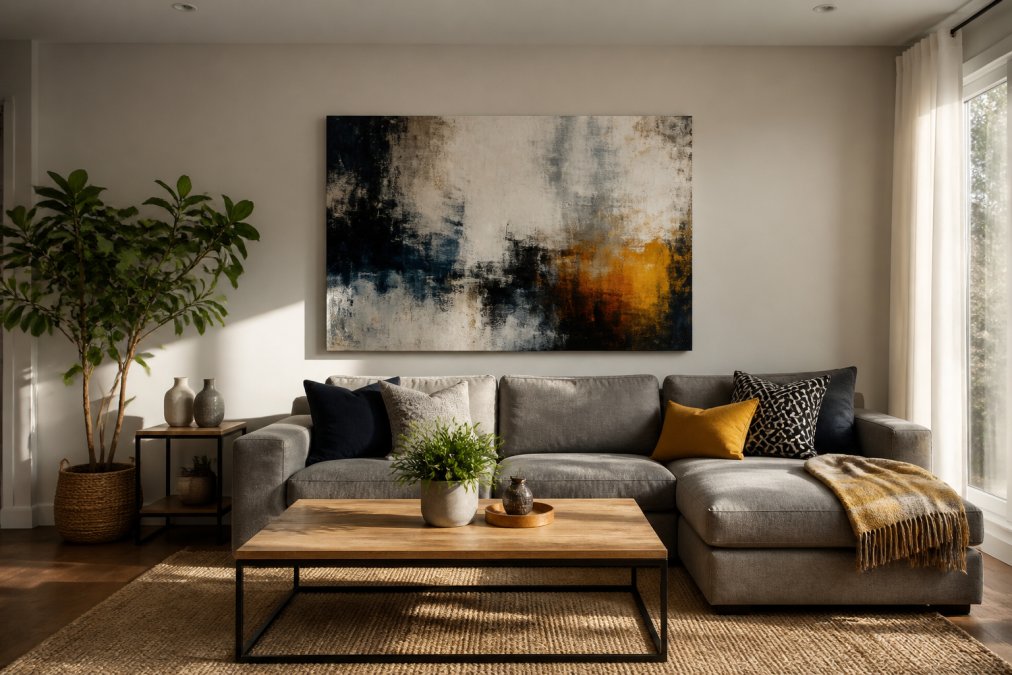
Hang the center of your canvas at eye level, roughly 57 to 60 inches from the floor. That standard comes from ElephantStock's hanging guide, and it works in almost any room. For oversized pieces above a sofa, keep the bottom edge 6 to 12 inches above the couch back.
Hanging Height and Eye Level for Oversized Pieces
Eye level is not the same for everyone. If you are tall, nudge the center up an inch or two. The goal is a canvas that meets your gaze when you walk in, not one you have to tilt your head to see.
Color Palette Coordination with Existing Furniture
Pull one or two colors from your room into the painting's palette, or let the art introduce a single bold accent. A cohesive color palette makes a busy wall feel calm. A clashing one makes even a small canvas feel loud.
How to Hang Art on Slanted Walls and Other Non-Standard Surfaces
Most guides stop at "use the right hardware." The real problem in an awkward space is that the wall itself refuses to cooperate, it slopes, it crumbles, or it is too hard to accept a nail. Each surface fails in a different way, so each one needs a different mechanism, not just a different screw.
Slanted and Sloped Walls
A sloped wall (a ceiling that angles down to meet the floor, common in attics, dormers, and stairwells) has no vertical plane to hang against. If you drive a hook into the slope, gravity pulls the canvas until it rests against the wall, and it will sit crooked, because the wall is not plumb.
- Picture rail: A horizontal rail mounted at a consistent height gives you a true vertical drop. Run picture wire from the rail to two hooks on the canvas back. This is the cleanest solution for a full sloped wall.
- Ceiling-mounted hook: For a single piece, a ceiling hook directly above the canvas center lets the art hang plumb regardless of the wall angle. Use a hook rated for at least twice the canvas weight.
- Lowest usable point: If you must anchor into the slope itself, anchor at the lowest point where the wall is closest to vertical, then use a long D-ring and wire so the canvas hangs level. Anchoring at the high point is the classic mistake, the art tilts with the wall and reads as broken.
Brick, Stone, and Concrete
Masonry does not grip a nail or a plastic anchor, it chips. The mechanism that works is a sleeve anchor or a masonry screw, which expands against the hole walls.
- Drill with a carbide-tipped masonry bit sized to the anchor. A hammer drill makes this dramatically faster on concrete.
- Drill slightly deeper than the anchor length so dust has somewhere to go.
- Blow or vacuum the dust out before inserting the anchor. Dust is the number-one cause of a masonry anchor pulling loose.
- For brick, drill into the face of the brick, never the mortar joint. Mortar is softer and will crumble under load.
- For a heavy canvas on brick or concrete, a sleeve anchor rated for the load is the safe choice; a plastic anchor is not.
Plaster and Lath
Plaster is brittle and sits over wood lath with a hollow gap behind it. A plain nail cracks the plaster face. A toggle bolt is the standard fix because it spreads its wings behind the lath and distributes the load across a wide area.
- Drill a hole just wide enough for the folded toggle to pass through.
- Insert the toggle, then tighten until the wings seat against the back of the lath.
- Keep the canvas weight moderate. Plaster and lath hold far less than modern drywall over studs.
- If you can find a stud behind the plaster, anchor there instead, it is always stronger.
Wood Paneling
Paneling is thin and often hollow behind. A screw into the panel alone will strip out under any real weight. The mechanism that works is anchoring into the stud behind the panel.
- Use a stud finder to locate framing, then drive a wood screw long enough to reach the stud through the panel.
- If no stud is available, use a toggle bolt sized for the panel thickness.
- Never rely on the panel's own thickness to carry a large canvas.
Matching the Anchor to the Load
A useful rule of thumb: a small canvas under about 10 pounds can often hang on a single well-set toggle or masonry anchor; a large canvas over about 25 pounds should hit a stud, a sleeve anchor, or a rail system. When in doubt, over-build the anchor. The cost of a heavier anchor is a few dollars; the cost of a fallen canvas is the art, the wall, and possibly a person underneath.
Gallery Wall Layout Ideas for Small Spaces and Irregular Walls
A gallery wall on a clean, empty rectangle is easy. A gallery wall on a wall with a door, a window, a thermostat, and a corner is a puzzle. The trick is to stop treating the wall as a rectangle and start treating it as a set of usable zones separated by fixed obstacles.
Map the Obstacles First
Before you place a single frame, mark every fixed element on the wall: doors, windows, outlets, switches, thermostats, vents, and molding. These are immovable. Your arrangement has to flow around them, not through them.
The Paper Template Method
Cut paper templates to the exact size of each canvas or frame. Tape them to the wall in your proposed arrangement. Live with them for a day, check them in morning light and at night. This is the single most reliable way to avoid holes you regret.
Spacing Rules That Actually Work
- Between frames: 2 to 3 inches is the standard gap for a tight, cohesive gallery wall. Wider gaps (4 to 6 inches) read as a looser, more modern arrangement.
- Above furniture: Keep the bottom edge of the lowest frame 6 to 12 inches above the furniture back, same as a single canvas.
- Around obstacles: Leave at least 3 to 4 inches of clearance between a frame edge and a door casing, window trim, or corner. Less than that and the arrangement looks cramped.
- Center height: Keep the center of the overall arrangement at eye level, roughly 57 to 60 inches from the floor, even if individual frames sit above or below that line.
Working Around Doors, Windows, and Corners
- Frame a window: Two matching vertical canvases, one on each side, create a deliberate symmetry that turns the window into the centerpiece.
- Fill a door-to-corner gap: One slender horizontal piece uses the full width without crowding the door swing.
- Stack beside a bookshelf: A vertical column of three small abstracts fills a narrow strip and echoes the shelf's height.
- Wrap a corner: Treat the two walls as one continuous arrangement, keeping the spacing consistent across the corner. This only works if both walls are visible from the same viewing angle.
- Go around a thermostat or switch: Leave it exposed and build the arrangement around it. Never hang art over a functional fixture.
Symmetrical vs. Asymmetrical Balance
Symmetrical arrangement mirrors itself around a center line. It reads as formal and calm, and it works best on a clean wall with a clear center.
Creative Alternatives: Floating Shelves, Leaning, and Propping
Not every canvas needs a hook. A floating shelf lets you layer art with books and objects, and you can swap pieces whenever you like. Leaning is even simpler: rest a large unframed canvas on the floor against the wall. According to iCanvas's 2026 trend notes, leaning oversized unframed canvases is one of the year's defining looks.
Using Interactive Visual Planning Tools Before You Commit
Most art-buying regret comes from guessing. Digital mockup tools let you upload a photo of your wall and drop a canvas onto it at true scale. You see the aspect ratio, the negative space, and the color palette against your actual furniture before you spend a dollar.
Here is a quick decision guide:
| Your Wall Situation | Best Approach | Why It Works |
|---|---|---|
| Slanted wall | Ceiling-mounted hook | Keeps canvas plumb |
| Brick or stone | Masonry bit and sleeve anchor | Holds in hard surfaces |
| Narrow strip | Slender horizontal canvas | Uses length, avoids clutter |
| Rental, no drilling | Lean or prop on shelf | Zero wall damage |
| Irregular gallery wall | Asymmetrical balance | Bends around obstacles |
Frequently Asked Questions
What is the 57-inch rule for hanging art?
The 57-inch rule means the center of the artwork should hang 57 inches from the floor, which is the average human eye level. For abstract canvas art in awkward spaces, adjust this if the primary viewing area is seated, such as above a sofa, where you might lower it slightly. Always measure from the floor to the center of the canvas, not the top.
How do you choose the right size canvas for a narrow wall?
For narrow walls, aim for a canvas that spans about two-thirds the width of the furniture below it. Leave at least 6 to 8 inches of empty wall space on each side to avoid a cramped look. Slender horizontal canvases with minimal abstractions work well for awkward spaces, allowing you to use the wall's length without clutter.
How can abstract art help balance an asymmetrical room?
Abstract art can balance an asymmetrical room by drawing the eye and creating a focal point. Use a large piece on the heavier side of the room to offset visual weight, or arrange a gallery wall with asymmetrical balance. The two-thirds rule for visual anchoring helps: size the art to relate to nearby furniture. This creates cohesiveness without requiring perfect symmetry.
What is the best way to arrange a gallery wall in a tight space?
In tight spaces, start with a symmetrical arrangement or a clean grid to avoid clutter. Use a consistent color palette and frame style to unify pieces. If the wall is irregular, treat the gallery as a single visual block and measure its total width to be about two-thirds of the furniture below. Interactive visual planning tools can help you test layouts before hanging.
An awkward wall is not a flaw to hide. It is a chance to place one bold, original canvas exactly where it belongs. Susan Fielder Art offers emotionally charged abstract originals, one-of-a-kind pieces from the iPlaid series, and a secure checkout backed by Art Storefronts registration. Get started with Susan Fielder Art and turn that difficult wall into the most striking corner of your home.