 how-to
9 DIY Purple Ribbon Crafts for Cancer Awareness
Quick Summary
Purple ribbon crafts are simple handmade items, such as safety pin ribbon loops, pins, bookmarks, keychains, painted rocks, and wreaths, that show support for cancer awareness. Most need only ribbon, a pin or glue, and scissors, and many take under an hour to make.
- Confirm the cause the purple ribbon represents before making crafts, since color meanings vary.
- A safety pin ribbon loop needs only a 6-inch ribbon piece, a safety pin, and scissors.
- Let the ribbon bookmark dry flat for about an hour before using it.
- Use low-temperature glue or fabric glue on the front of ribbon pins to avoid shiny spots.
- Store finished pieces away from direct sun, which can fade purple dye over time.
Table of Contents
- Why Purple Ribbon Crafts Work for Cancer Awareness
- Materials and Supplies You Need for Purple Ribbon Crafts
- How to Make Awareness Ribbons with Safety Pins
- Easy DIY Purple Ribbon Crafts for Cancer Awareness
- How to Make Two-Color Awareness Ribbons
- DIY Cancer Awareness Wreath Step by Step
- Making Your Purple Ribbon Crafts Last and Share Them Respectfully
- Start Your First Purple Ribbon Craft This Weekend
- Frequently Asked Questions
Why Purple Ribbon Crafts Work for Cancer Awareness
Last Updated: November 8, 2026
Purple ribbon crafts are a simple, hands-on way to show support for cancer awareness. Making something with your own hands turns a symbol into a conversation. A purple ribbon on a wreath or a pin on a jacket invites a question, and that question opens the door to talking about cancer, survivors, and the people still in treatment.
Purple is most commonly associated with pancreatic cancer awareness, and it also appears in campaigns for other causes. Color meanings are not universal: they can vary by organization, campaign, and even by local event.
A quick way to choose a design is to match the ribbon to the cause's published color. If you are making crafts for a mixed group, a solid purple ribbon is a safe, widely recognized choice, while a two-color ribbon can signal a more specific cause when you know the pairing.
Crafting also has a practical benefit. You can make a few pieces in an afternoon, give them away, or sell them at a bake sale or school fundraiser. A handmade ribbon carries a personal touch that a store-bought one often lacks.
- Easy to learn, even for beginners
- Low cost, using scraps you may already own
- Works for solo projects or group crafting sessions
- Gives you a reason to start a conversation
One more reason purple crafts work: they scale. A single pin is a quiet gesture, but a batch of pins for a school event or a church sale becomes a visible show of support and a possible fundraiser.
Materials and Supplies You Need for Purple Ribbon Crafts
Most purple ribbon projects need only a few basic supplies. Start with what you have at home, then add specialty items only if a project calls for them.
- Purple ribbon in one or two widths (about 1/4 inch and 1/2 inch works well)
- Safety pins or pin backings
- Felt scraps, fabric, or tulle for layering
- Scissors and a ruler
- Hot glue or fabric glue
- A wire or grapevine wreath base for home decor projects
Check the color before you buy. Purple shades vary a lot, so bring a sample if you are matching existing pieces. Keep a small stash of spare pins and glue, since you will likely use them across several projects.
How to Make Awareness Ribbons with Safety Pins
This is the fastest project on the list, and the best place to start. You only need ribbon, a safety pin, and scissors.
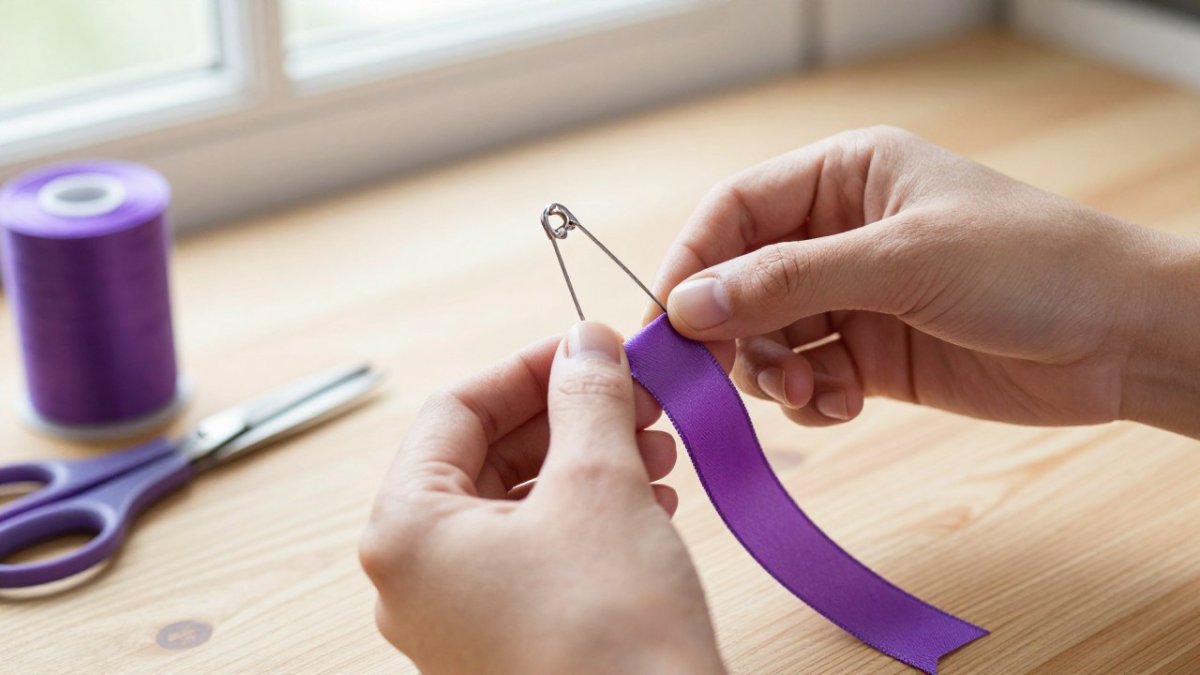
- Cut a 6-inch piece of purple ribbon.
- Fold the ribbon into a loop, overlapping the ends by about half an inch.
- Pinch the center and wrap a small piece of thread or wire around it to hold the loop.
- Slide the safety pin through the center and close it.
- Trim any loose ends so the loops look even.
Make a few at once and keep them in a small bag. They are easy to hand out at events or pin to a bag strap.
Watch out: Keep the pin closed and tucked away when children are nearby, since exposed pins can scratch or poke.
Easy DIY Purple Ribbon Crafts for Cancer Awareness
Once you have the basic loop down, try these beginner projects. Each one takes less than an hour, and most use supplies you likely already have. Measurements below are starting points; adjust them to the size you want.
Ribbon pin with a felt center
- Make the safety-pin loop from the previous section using a 6-inch piece of 1/2-inch purple ribbon.
- Cut a felt circle about 1 inch across in a contrasting color, such as white or light gray.
- Put a small dot of hot glue or fabric glue in the center of the felt and press it onto the front of the ribbon loop.
- Hold for 30 seconds until the glue sets, then trim any felt overhang.
Watch out: hot glue can bleed through thin ribbon and leave a shiny spot, so use a low-temperature glue gun or fabric glue on the front-facing side.
Ribbon bookmark
- Cut a 12-inch strip of 1/2-inch purple ribbon.
- Cut a piece of stiff felt or cardstock 2 inches by 6 inches as the backing.
- Run a thin line of fabric glue down the center of the backing and press the ribbon flat onto it.
- Fold the top 1 inch of ribbon over the back and glue it down to hide the raw edge.
- Add a 3-inch tassel at the bottom by folding three 6-inch strands of embroidery floss in half and tying them through a small hole punched in the backing.
Let the bookmark dry flat for about an hour before using it, or the ribbon can shift.
Keychain
- Cut a 5-inch piece of 3/8-inch purple ribbon.
- Fold it in half and push the folded end through a 1-inch split keyring.
- Pull the loose ends through the loop and tighten to form a lark's head knot.
- Thread one or two small beads onto the loose ends and tie a knot below them to hold the beads in place.
- Trim the ends at an angle to reduce fraying, or seal them with a tiny dot of fabric glue.
Painted rock
- Choose a smooth stone about 2 to 3 inches across and wash it with dish soap, then let it dry fully.
- Paint the top with two coats of purple acrylic paint, letting the first coat dry about 20 minutes before the second.
- When the paint is dry, paint a simple ribbon shape with a thin brush or use a purple paint pen.
- Add a short message such as "You are not alone" or "Hope" in permanent marker or paint pen.
- Seal with a clear acrylic spray outdoors or in a well-ventilated area, following the product label.
Painted rocks work well for community rock-hiding groups and for placing at a park or coffee shop. Keep messages supportive and general rather than naming a specific person's diagnosis unless you have permission. Using high-quality acrylics and durable sealants ensures your painted messages remain vibrant for passersby, and you can source these professional materials through Somethings Country to elevate the longevity of your outdoor displays.
Batch tips for group crafting
If you are making a dozen or more items for an event, set up stations: one for cutting ribbon, one for gluing, and one for attaching pins or keyrings. Cut all ribbon to length first, then assemble in batches. For classrooms and older adults, skip hot glue and use fabric glue or glue dots, and pre-cut felt shapes so no one has to handle scissors for long periods.
Each project works well on its own or as part of a set. Making a dozen small items in one sitting is a good way to build a supply for an event, and the same purple ribbon stash covers pins, bookmarks, keychains, and wreath accents.
Here is a quick reference for the beginner projects covered above, with the key detail for each.
| Project | Time | Key tip |
|---|---|---|
| Ribbon pin with a felt center | Under 1 hour | Use low-temperature glue or fabric glue on the front |
| Ribbon bookmark | About 1 hour plus drying | Let it dry flat for about an hour before use |
| Keychain | Quick | Trim ends at an angle or seal with fabric glue |
| Painted rock | Several steps with drying | Apply two coats of purple paint and seal outdoors |
| Batch crafting | Varies by quantity | Cut all ribbon first, then assemble in stations |
How to Make Two-Color Awareness Ribbons
Two-color ribbons look more layered and make a nice gift for someone with a specific cause in mind. Pair purple with white, gray, or gold, depending on the cause you want to highlight.
- Cut two ribbon strips, one purple and one contrasting color, each 8 inches long.
- Lay them side by side with a half-inch overlap.
- Fold them together into a single loop, keeping the colors visible on each side.
- Secure the center with a wire or pin.
- Trim the ends and add a bow if you like.
Two-color ribbons take a little more time, but they stand out on a table or in a gift bag. Check the color meaning for each ribbon before giving it away.
DIY Cancer Awareness Wreath Step by Step
A wreath is a bigger project, but it makes a striking display for a front door or an event table.
- Start with a plain grapevine or wire wreath base.
- Wrap purple ribbon around the wreath in even sections, securing each with glue or floral wire.
- Add felt flowers or tulle loops around the outside for texture.
- Attach one or two larger ribbon bows at the top.
- Hang the wreath and check that it stays balanced.
Plan about an hour for the full project. Use hot glue for quick hold, and floral wire for anything that needs to last outdoors.
Making Your Purple Ribbon Crafts Last and Share Them Respectfully
Good materials and careful handling help your crafts last longer. Store finished pieces in a dry place away from direct sun, which can fade purple dye over time. For outdoor wreaths, use weather-resistant ribbon and bring them in during heavy rain.
When you give your crafts away, keep the message respectful. Explain what the ribbon represents, and ask the recipient what cause means the most to them. Avoid making the gift about a specific person's diagnosis unless they have shared that story with you.
Many people like to turn their crafts into a fundraiser. You can sell pins at a school event, a church sale, or a local market and donate the proceeds to a cancer organization you trust. Check that the organization is registered before you promise any donation amount.
Start Your First Purple Ribbon Craft This Weekend
Pick one project from this list and set aside an hour. The safety pin ribbon is the easiest place to start, and it takes only minutes. Once you have made a few, try the wreath or the two-color ribbon.
If you are looking for meaningful pieces to give or display, Susan Fielder Art offers original artwork that carries a story of healing and resilience, with 10% of proceeds donated to pancreatic cancer research. Explore the collection to find a piece that fits your space and your cause.
Frequently Asked Questions
What cancer does the purple awareness ribbon represent?
Purple ribbons are most often associated with pancreatic cancer awareness, though purple is also used by some groups for other cancers and causes. Because color meanings vary by organization and campaign, check the specific cause before you make ribbons for an event or fundraiser. Matching the color to the cause keeps your crafts accurate and respectful, especially when you give them to people affected by that disease.
What materials do I need to make a purple awareness ribbon?
A basic purple awareness ribbon needs purple ribbon or felt, a safety pin or pin backing, scissors, and a small amount of hot glue or strong craft glue. Some makers add tulle or a small gemstone for extra shape and sparkle. Most supplies are inexpensive craft-store items, and you can start with materials already at home. Clear, sturdy materials make the finished ribbon last longer when it is worn or handled often.
Can I make a two-color awareness ribbon?
Yes. Two-color ribbons combine purple with a second shade, such as white, silver, or gold, to represent a family, a combined cause, or a personal message. Cut two loops of different colors, layer them, and secure the center with a single pin or stitch. Keep the purple dominant when you are honoring a purple-ribbon cause so the message stays clear.
How do you make an awareness ribbon with a safety pin?
Cut a strip of purple ribbon about 8 inches long, fold it into a loop with the ends overlapping in the center, and pinch the middle. Slide a safety pin through the pinched section so the loops stay together. Trim any loose ends and add a dot of glue to keep the pin secure. The finished ribbon can be worn on clothing or attached to a card or gift.